

Table of Contents
- What You'll Need: Go-Kart Assembly Tools
- Kids Go-Kart Assembly Instructions: Frame and Chassis Setup
- Go-Kart Steering Assembly and Alignment
- Motor and Drivetrain Installation
- Seat, Pedals, and Ergonomic Adjustment
- Kids Go-Kart Safety Inspection Before First Ride
- Common Assembly Mistakes and Troubleshooting
- Preventative Maintenance After Assembly
- Frequently Asked Questions
Last Updated: October 5, 2026
What You'll Need: Go-Kart Assembly Tools
To assemble kids go karts properly, you need the right tools and a clear workspace. Gather everything before you start.
Here's what you need:
- Socket wrench set (metric and standard sizes)
- Adjustable wrench
- Screwdriver set (Phillips and flathead)
- Allen key set
- Torque wrench (critical for fastener torque settings)
- Pliers (needle-nose and standard)
- Hammer or rubber mallet
- Jack or lift (for raising the chassis)
- Safety glasses and work gloves
A torque wrench is non-negotiable. Fasteners on the steering linkage, axle, and frame require specific torque settings. Under-tightening creates safety hazards; over-tightening strips threads. Manuals specify values in foot-pounds (ft-lbs) or Newton-meters (N-m).
Kids Go-Kart Assembly Instructions: Frame and Chassis Setup
The frame is the foundation when you assemble kids go karts. Everything else bolts to this steel tubular structure.
Unpack and Inspect Components
Open the box carefully. Check that all major parts are present: frame, axles, wheels, seat, steering components, motor or engine, and fastening hardware.
Inspect the steel tubular frame for cracks or bends. Small surface rust is normal; deep pitting or visible cracks mean a structural problem.
Take photos of the unboxing. If something arrives damaged, documentation helps with warranty claims.
Assemble the Steel Tubular Frame
Most kids go karts arrive partially assembled. Frame pieces bolt together using the kit's fastening hardware.
Follow these steps:
- Lay the frame on a clean, flat surface
- Identify frame sections that need connecting (typically front and rear)
- Align bolt holes, then insert bolts
- Hand-tighten all fasteners first
- Torque to the manual's specification
- Verify the chassis sits flat on the ground
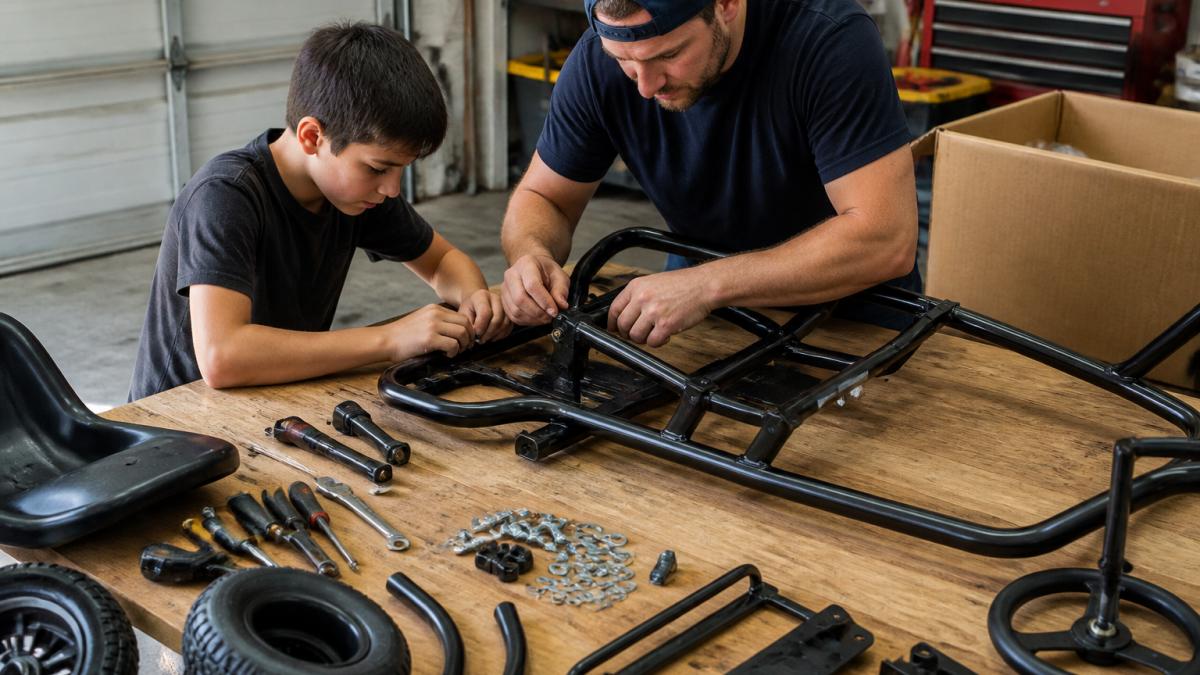
Frame welds should be clean with no visible cracks. If you spot one, stop assembly and contact the manufacturer.
Install the Axle and Wheel Hubs
The axle connects the wheels to the chassis. Proper alignment prevents steering problems and uneven tire wear.
Here's how to install it:
- Position the axle assembly under the frame
- Align the mounting brackets on both sides
- Insert bolts through the frame into the axle mounting points
- Hand-tighten, then torque to the manual's specification
- Slide wheel hubs onto the axle shaft and insert retaining clips
- Spin each wheel by hand to verify free rotation
If a wheel binds or drags, the hub is misaligned. Loosen the fastener, reposition the hub, and retighten.
Load capacity depends on axle strength and bearing quality. Check your go-kart's maximum rider weight; exceeding it stresses the axle and shortens its lifespan.
Go-Kart Steering Assembly and Alignment
The steering linkage connects the steering column to the front wheels. Misalignment causes pulling to one side or sluggish response.
Mount the Steering Column
The steering column is the vertical shaft connecting to the handlebars or steering wheel. It mounts to the frame at a pivot point.
Installation steps:
- Position the steering column bracket on the frame
- Align the mounting holes and insert fasteners
- Hand-tighten, then torque to specification
- Check that the column rotates smoothly and the pivot point is secure
The steering column should move freely in all directions. If it's stiff or catches, loosen the fasteners slightly and reposition until movement is smooth.
Connect the Steering Linkage
The steering linkage transfers movement from the column to the front wheels. Proper alignment ensures responsive steering.
Follow these steps:
- Attach the tie rods to the steering column using the provided pins or bolts
- Connect the opposite ends to the wheel hubs or steering arms
- Hand-tighten, then torque to the manufacturer's specification
- Turn the wheel fully left, then fully right; wheels should respond evenly
Steering linkage that's too loose causes play in the steering. You'll feel it as slop in the handlebars. Too tight and steering becomes heavy and unresponsive.
Motor and Drivetrain Installation
The motor (electric or gas) powers the go-kart. The drivetrain transfers that power to the wheels.
Mount the 12V Motor or Engine
For electric kids go karts, the 12V motor (or higher voltage, depending on model) bolts to the frame via a motor mount bracket.
Installation process:
- Position the motor mount bracket on the frame and align mounting holes
- Insert fasteners and hand-tighten
- Slide the motor into the bracket, aligning the shaft with the drivetrain connection point
- Torque all fasteners to specification
- Verify the motor shaft rotates freely without hitting the frame
For gas-powered models, engine mounting is similar but heavier. Ensure the bracket is secure so vibration won't loosen fasteners.
Check the amperage and voltage specifications for electric motors. The battery system must supply the correct voltage. A 48V motor requires a 48V battery pack.
Install the Wiring Harness and Throttle Control
The wiring harness connects the battery, motor, and throttle control. Proper wiring is essential for safety.
Steps for electric go-karts:
- Route battery cables from the battery pack to the motor controller
- Connect the positive (red) cable to the positive terminal and the negative (black) cable to the negative terminal
- Attach the throttle control wires to the throttle pedal
- Connect the kill switch (emergency stop) in the circuit
- Verify all connections are tight and insulated, then test throttle response before the first ride
For gas engines, connect the fuel line from the tank to the carburetor. Ensure the fuel line is secure and won't pinch or kink.
Seat, Pedals, and Ergonomic Adjustment
The seat and pedals must fit the rider's size and allow comfortable control.
Most kids go karts have adjustable seats that slide on rails. Adjust so the rider reaches the pedals comfortably with legs slightly bent.
Here's how:
- Have the child sit in the seat
- Check they can reach the throttle and brake pedals with their toes, legs slightly bent when pedals are fully extended
- Loosen the seat mounting bolts, slide the seat as needed, and retighten securely
Pedals bolt directly to the frame or motor controller. Verify they move freely and return to neutral when released.
The seat belt must be secure and snug.
Kids Go-Kart Safety Inspection Before First Ride
Before your child's first ride, perform a thorough safety inspection to catch assembly mistakes and prevent accidents.
MotoTec Sandman Gas Go Kart for kids Blue →
Check Frame Integrity and Fastener Torque
Inspect the entire steel tubular frame for cracks, bends, or damage. Run your hand along all welds; they should be smooth with no gaps or cracks.
Use your torque wrench to check critical fasteners:
- Frame connection points
- Axle mounting bolts
- Steering column fasteners
- Motor mount bolts
- Seat fasteners
Retighten any loosened fasteners; it's normal for some bolts to loosen slightly during assembly.
| Fastener Location | Typical Torque Range | Check Frequency |
|---|---|---|
| Frame connections | 20-30 ft-lbs | Before first ride |
| Axle bolts | 25-35 ft-lbs | Every 5 rides |
| Steering fasteners | 15-25 ft-lbs | Before each ride |
| Motor mount | 30-40 ft-lbs | Every 10 rides |
| Seat bolts | 15-20 ft-lbs | Weekly |
Test Braking System and Safety Harness
The braking system must stop the go-kart reliably. Most kids go karts use hydraulic rear disk or mechanical brakes.
Test the brakes:
- Push the go-kart by hand and apply the brake pedal
- It should stop smoothly without skidding, and the pedal should feel firm, not spongy
- Release the brake and verify the wheels spin freely
A spongy brake pedal indicates air in the hydraulic lines or low brake fluid. Consult the assembly manual for brake bleeding instructions.
Check the safety harness (seat belt) for proper function:
- The belt should be snug but not restrictive
- The buckle should click firmly and not come loose
- The belt should not twist or bind
- Test the quick-release mechanism if equipped
Verify Steering Response and Load Capacity
Test steering response by turning the handlebars or steering wheel through their full range. Front wheels should respond smoothly and evenly.
Steering that's too loose (excessive play) or too tight (stiff) indicates a linkage problem. Adjust linkage fastener torque as needed.
Check the load capacity listed in the assembly manual. The MotoTec Sandman Gas Go Kart supports riders up to 185 lbs; the MotoTec Mud Electric 48v 1000w Go Kart accommodates up to 150 lbs.


Common Assembly Mistakes and Troubleshooting
Here's how to spot and fix the most common assembly mistakes.
Loose Fasteners
Symptom: Rattling noises, loose steering, or frame movement.
Fix: Use your torque wrench to check all fasteners.
Misaligned Steering Linkage
Symptom: The go-kart pulls to one side or steering feels unresponsive.
Binding Wheels
Symptom: Wheels don't spin freely or drag during turns.
Fix: Check axle alignment and fastener torque.
Throttle Not Responding
Symptom: Pressing the throttle doesn't increase speed or response is delayed.
Brake Pedal Feels Spongy
Symptom: The brake pedal goes to the floor without stopping effectively.
Preventative Maintenance After Assembly
Regular maintenance keeps your kids go karts running safely and extends their lifespan.
Weekly Checks
- Inspect the frame for new cracks or damage
- Check all fasteners and retighten if loose
- Test the brakes and steering
- Verify the seat belt is secure
Monthly Maintenance
- Clean the air filter (gas engines)
- Check tire pressure and tread depth
- Inspect the wiring harness for damage or loose connections
- Lubricate the steering linkage and axle pivot points
Seasonal Maintenance
- Change the oil (gas engines)
- Inspect the suspension for damage
- Check the battery condition (electric models)
- Replace worn tires
Keep a maintenance log of each service to stay on schedule and catch problems early.
At SalePriced, we recommend following the manufacturer's maintenance schedule. Requirements vary by engine type, suspension design, and load capacity.
Assembling kids go karts safely requires attention to detail and patience. Our MotoTec Mud Gas 98cc Go Kart and MotoTec Sandman Gas Go Kart come with detailed assembly manuals and ship from the U.S. with full safety certification.

Frequently Asked Questions
How long does it take to assemble a kids go-kart?
Assembly typically takes 4 to 8 hours, depending on your mechanical experience and the model. Simpler electric models like the MotoTec Mud 48v may take closer to 4 hours, while gas-powered go-karts with more complex engine and drivetrain components can require 6 to 8 hours. Breaking the work into stages, frame assembly one day, motor and steering the next, makes the process less overwhelming.
What tools do I need to assemble a kids go-kart?
You'll need a socket set (metric and standard), wrenches, screwdrivers (Phillips and flathead), a torque wrench for fastener settings, pliers, a rubber mallet, jack stands, and safety glasses. For gas-powered models, a spark plug socket and fuel line crimper are helpful. A workbench or sturdy table keeps components organized. Most go-kart assembly instructions specify fastener torque settings, so a torque wrench prevents over-tightening fasteners on the frame, axle, and steering column.
How do I know if my assembled go-kart is safe for my child to ride?
Perform a kids go-kart safety inspection before the first ride. Check that all fasteners are tight and torqued to specification, the steering linkage moves freely without binding, brakes engage smoothly, the seat belt and roll bar are secure, and the frame shows no cracks or damage. Test the throttle control and kill switch. Verify your child's height and weight are within the manufacturer's limits. Gas-powered models must be EPA approved. Review the assembly manual's safety section before allowing any ride.
What's the most common assembly mistake parents make?
Over-tightening or under-tightening fasteners on the frame, axle, and steering column is the most frequent error. Too tight can crack the frame or strip bolt threads; too loose causes vibration and loosening during use. Always use the torque wrench with the manufacturer's specified settings. The second mistake is improper steering linkage alignment, which causes the go-kart to pull to one side. Take time to center the steering column and verify that both front wheels track straight before assembly is complete.
0 comments